Build it yourself
These designs are open source. Copy them, change them and share them, including for your club. Credit LevelBow, and share your changes under the same licence. CC BY-SA 4.0
Guide 1 · LevelBow P1
Build LevelBow P1 for under $50
Guide 2 · Adaptive rig for VI archers
Build an adaptive rig for visually impaired archers
Guide 1 · LevelBow P1
Build LevelBow P1 for under $50
- Draw weight
- 6–7 lb
- Length
- 64 in
- Draw length
- 24–31 in
- Weight
- 390 g
- Cost to build
- Under $50
What you need
- One 10 ft length of ½ in Schedule 40 PVC pipe. Each bow uses a 68 in piece.
- A 64 in nylon string
- A heat gun
- A hacksaw
- A tape measure and a marker
- Heat-resistant gloves
- A luggage scale, to check the draw weight
Every time you use it
- Never draw and release without an arrow. Releasing an empty string (a dry fire) can break the bow, even one as light as P1.
- Check the bow for cracks or white stress marks before every session, especially at the bends. Retire a cracked bow.
- Use arrows long enough that the arrow point stays in front of the bow at full draw.
- Store the bow indoors, out of the cold and the sun. Cold PVC is more brittle, so take extra care in cold weather.
Step 1: Mark and cut the pipe
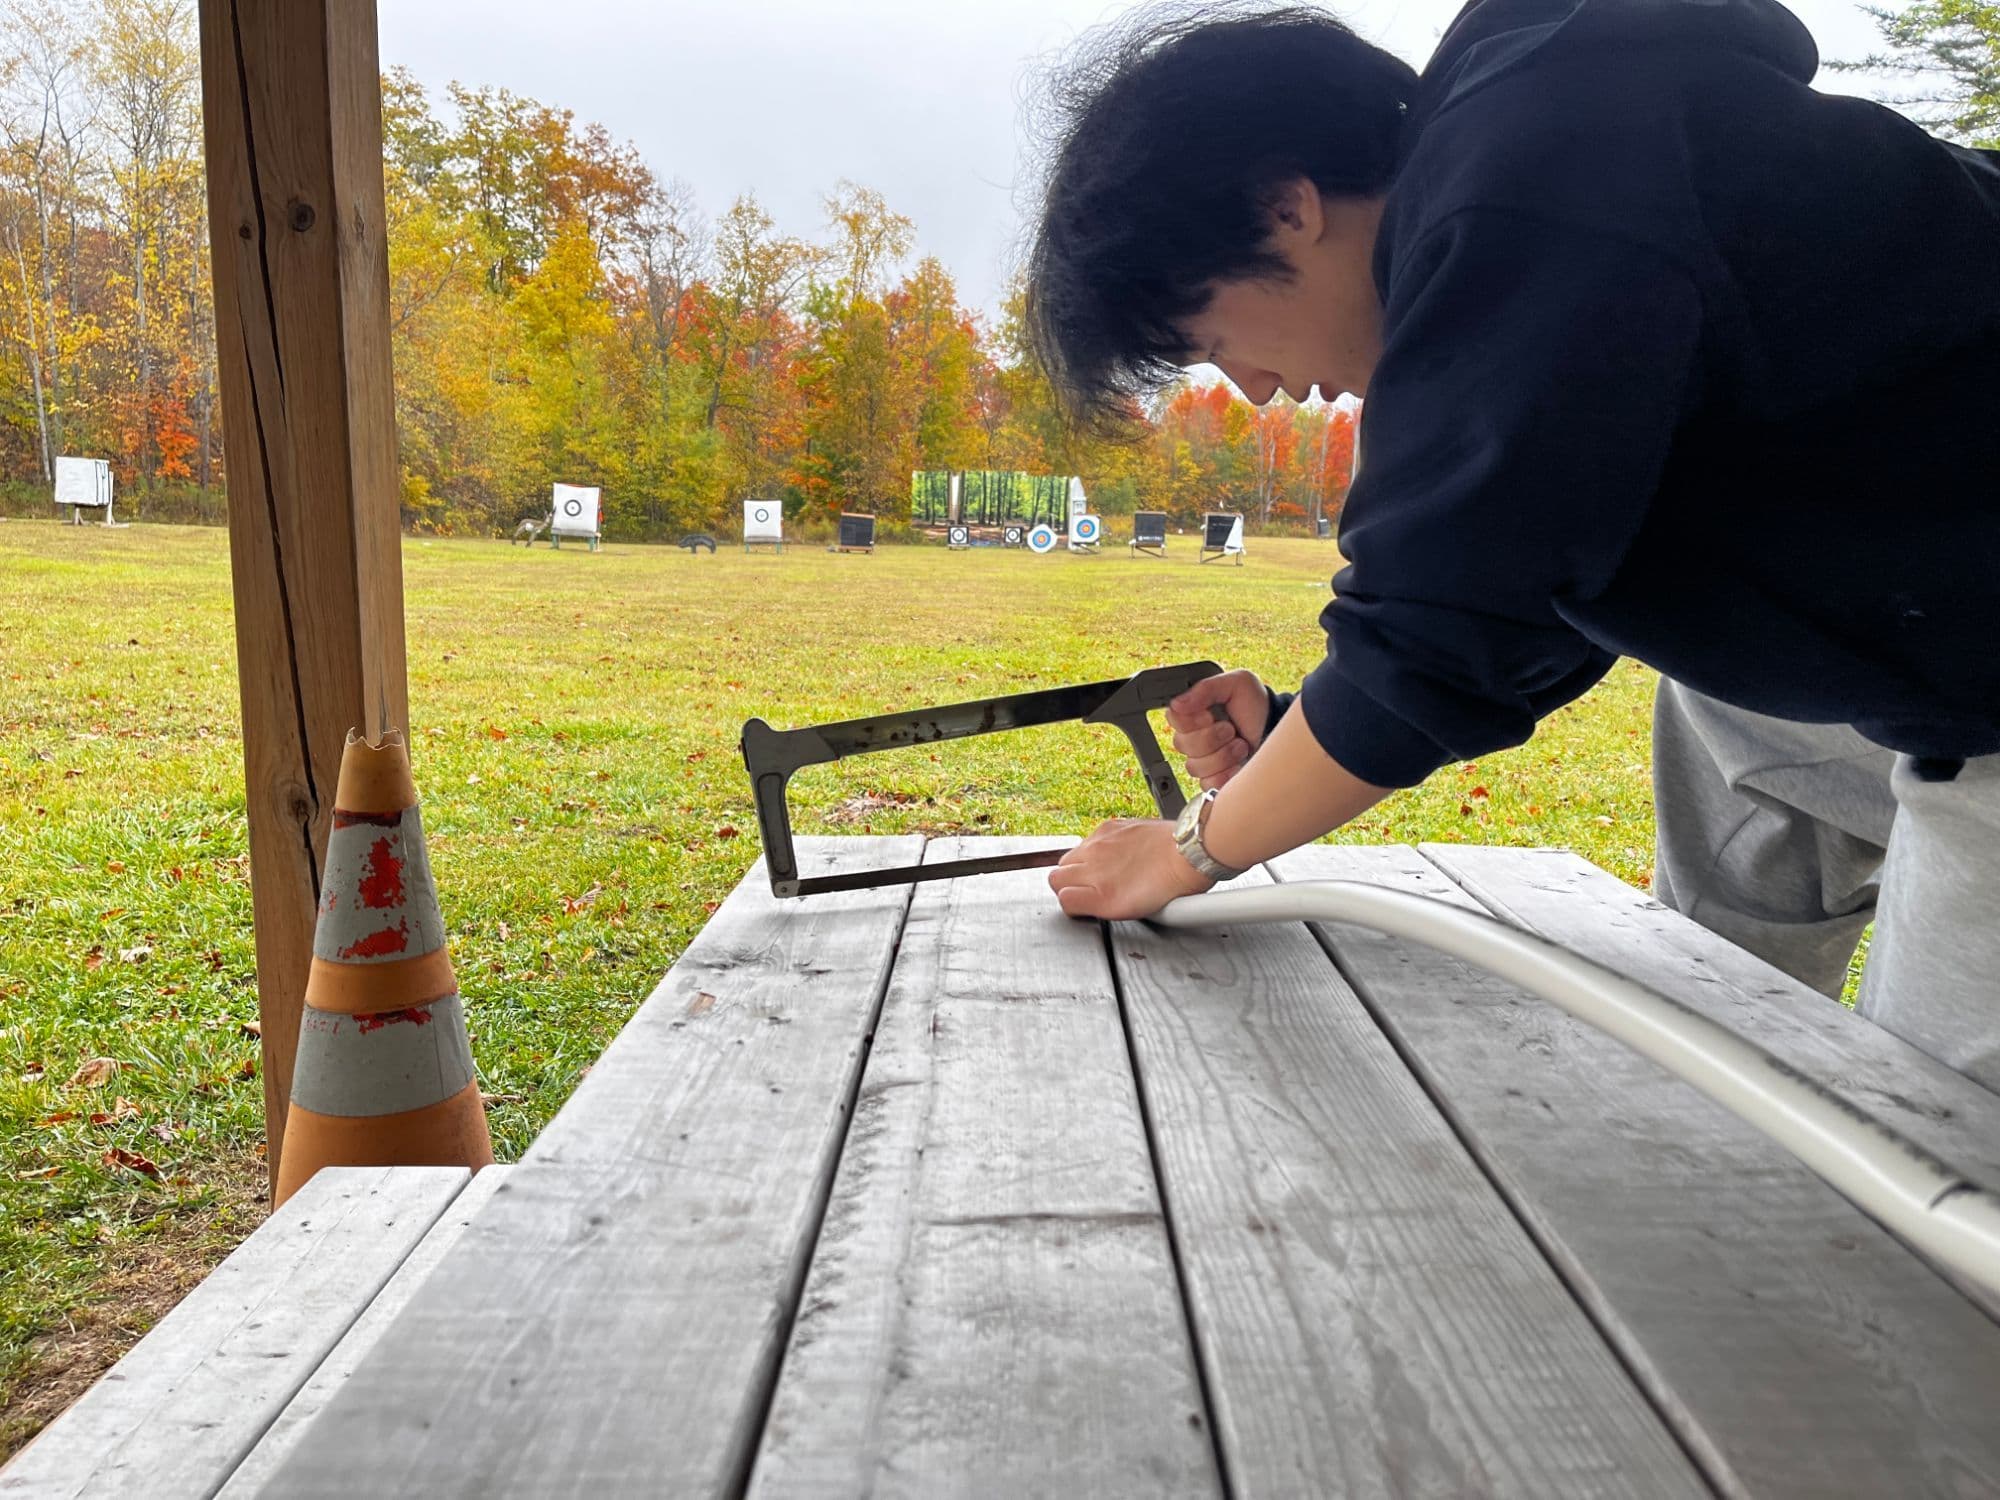
Measure 68 in along the pipe, mark it, and cut it with a hacksaw. That 68 in stick takes a 64 in string once the tips are bent. Smooth the cut ends so they can’t fray the string or cut a hand.
Step 2: Heat and bend the tips
Have a partner hold the pipe steady, with their hands well away from the part you’re heating. Warm one end with the heat gun, and keep the heat gun moving so the pipe heats evenly. When it softens, bend the tip away from the archer, toward the target side, into a recurve. Hold it until it cools. Repeat on the other end, bending the same way.
Work outside or somewhere with good airflow, and wear heat-resistant gloves. Stop if the pipe starts to brown or smoke. Overheated PVC gives off harmful fumes.
Step 3: Check the curve
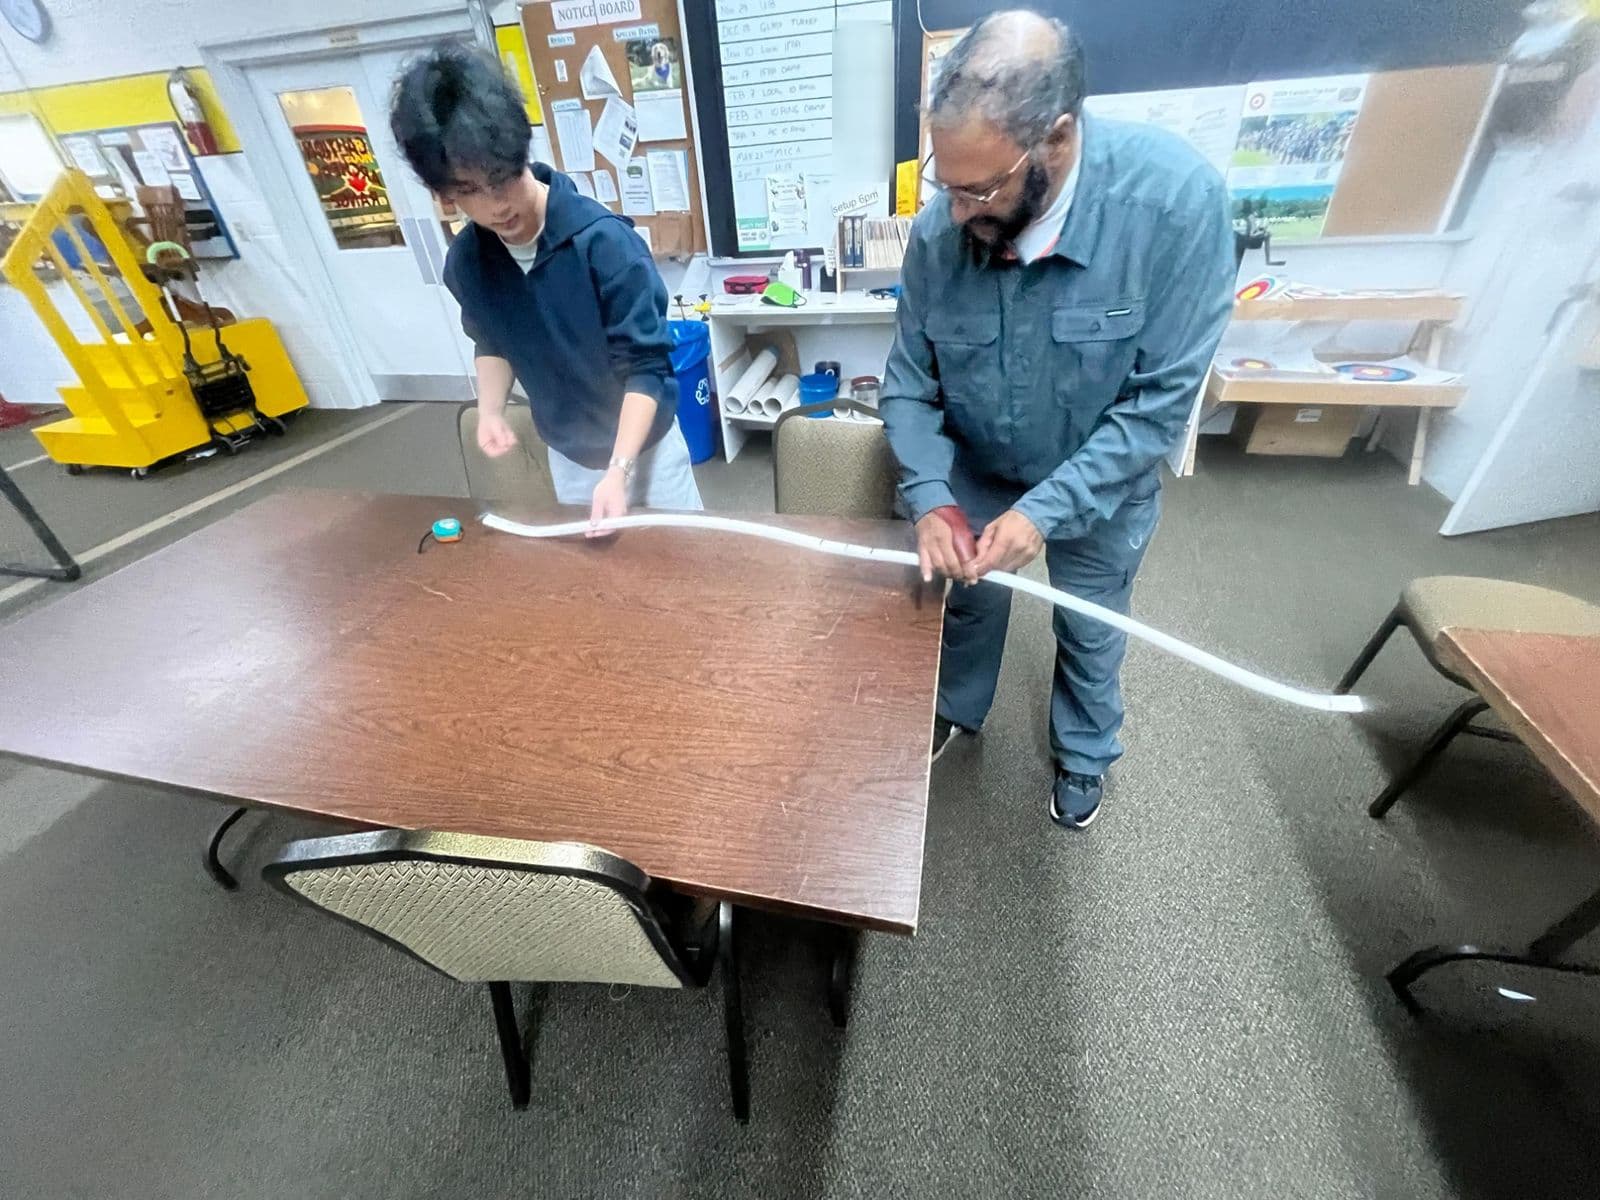
Lay the bow on a flat table and compare the two tips. They should bend the same way and by about the same amount. If they don’t, warm the tip again and adjust it. Check each bend for kinks, flat spots or brown marks. A kinked or scorched bend is weak, so start again with new pipe.
Step 4: String it
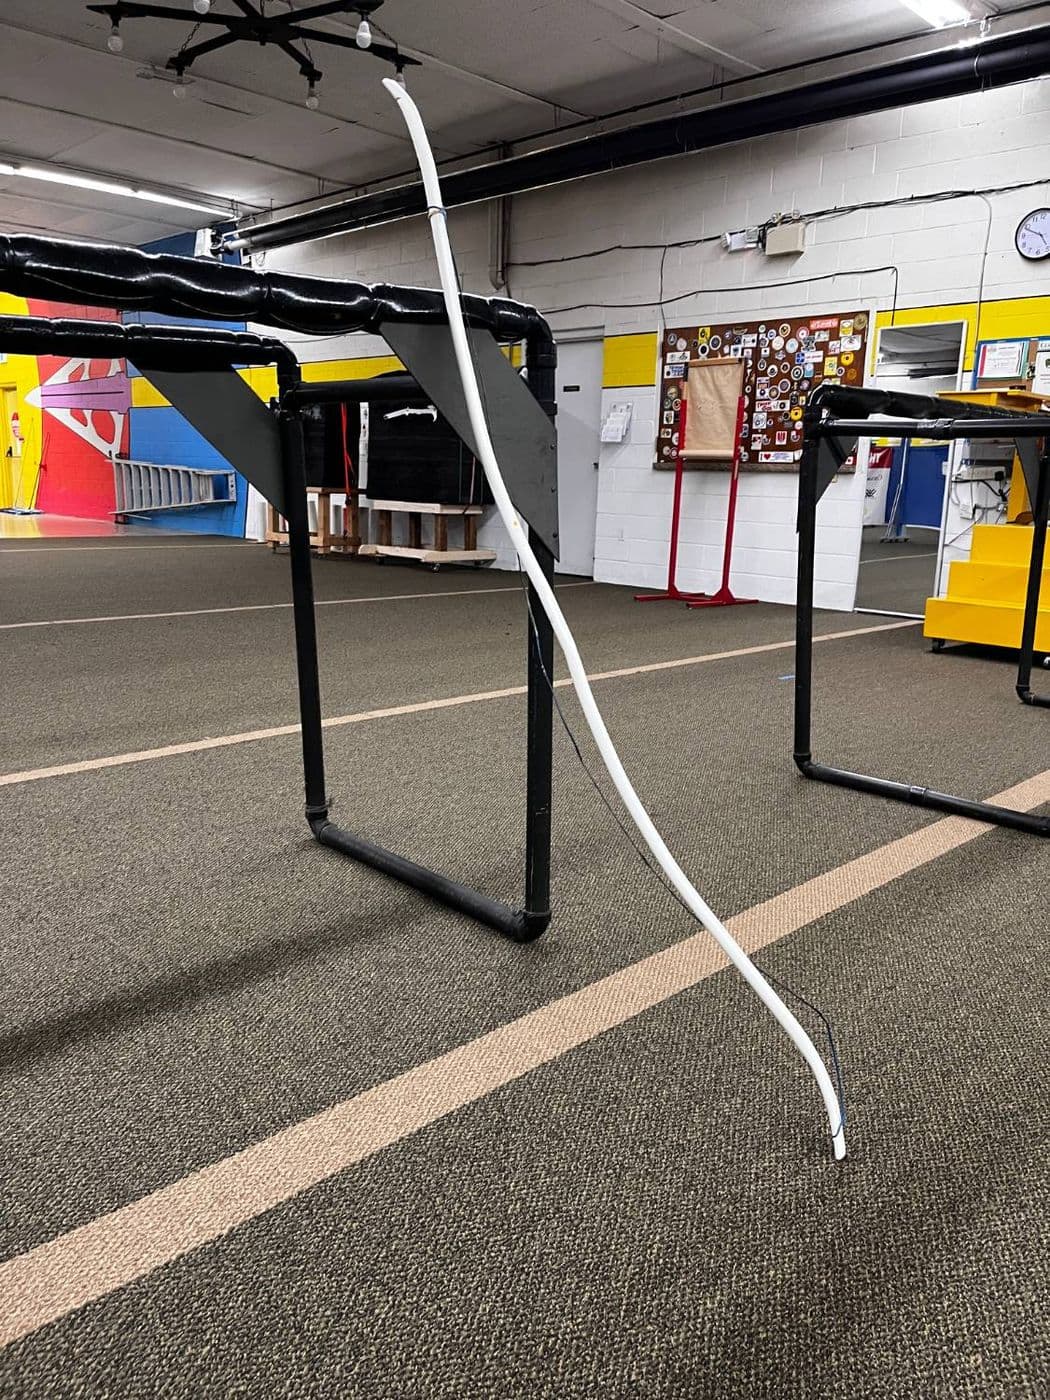
Tie the 64 in nylon string from tip to tip. The string holds the bend and turns the pipe into a bow. Make sure each end of the string sits firmly and can’t slide along the tip or slip off at full draw.
Step 5: Check the draw weight
One person holds the bow by the grip. Hook a luggage scale on the middle of the string, pull it slowly back to the archer’s draw length (P1 suits 24 to 31 in) and read the weight. Then let the string forward slowly. Never let go of it with no arrow on the string. Ours reads 6 to 7 lb, depending on draw length.
Step 6: First draws
Before anyone else uses the bow, a coach tries it, wearing eye protection, with an arrow, at short range, into a large target. Start with short draws and work up to full draw, checking the bends between draws. Only then does an archer try it.
Guide 2 · Adaptive rig for VI archers
Build an adaptive rig for visually impaired archers
What you need
- A sturdy tripod. Ours are second-hand.
- PVC pipe and fittings, to hold the contact point
- One contact point, no bigger than 2 cm: a small bead, probe or bar
- A foot locator
- A sandbag or weight for the tripod
- Tape and a marker, to mark the settings
Rules to follow
- The contact point can be no bigger than 2 cm in any direction, and it touches only the back of the bow hand, between the wrist and the base of the fingers (World Archery Rulebook Book 5, 34.4.2).
- For competition, the stand and foot locators together can be no more than 80 cm wide, and the stand can’t get in other archers’ way.
- Archers in the VI1 class wear a blindfold. VI2 archers don’t.
- A spotter sits 1 m behind the line, tells the archer where arrows land, and flags safety issues.
- Check the current rules with World Archery and your national body before any competition.
Every time you use it
- No clamps or gaps that could pinch a finger or catch the string.
- Check that every joint is locked before each end.
Step 1: Put the foot locator down first
Set the foot locator on the line where the archer will stand. Everything else is set from it, so aim and stance share one reference.
Step 2: Set up the tripod
Place the tripod so it can reach the archer’s bow hand at full draw. Spread and lock the legs, and weight the base so a light touch can’t move it. Keep the legs, the weight and the foot locator out of the walking path, and guide the archer to and from the line.
Step 3: Mount the contact point
Use PVC pipe and fittings to hold the contact point out from the tripod. Only the contact point should touch the archer.
Step 4: Fit it to the archer
The archer draws with an arrow, pointed at the target, while a helper behind the line notes where the bow hand sits. The archer lets down, then the helper moves the contact point. Repeat until it rests on the back of the bow hand at full draw, then lock every joint.
Step 5: Check the clearance
Have the archer draw and let down slowly a few times. The string, the arrow and the bow arm must not touch the stand.
Step 6: Mark it and write it down
Mark each setting with tape and write it down for that archer, with the stand’s distance from the foot locator. Next session, set it up the same way from your notes.
Before you build
Build and use these at your own risk. They aren’t certified equipment. A qualified coach should check every new bow and rig before anyone uses it, and supervise every session.
LevelBow is sport equipment. We make no medical or therapy claims.
Built one, changed the design, or have a question? Email us at levelbowinfo@gmail.com.